Hiking Guide: Getting the Most out of Day-hiking and Backpacking
Hiking in the grandeur of mother nature can do a lot of things for different people. From ultra-competitive trail runners besting their previous time to nature enthusiasts enjoying their surroundings, there are many ways you can enjoy hiking.
This guide’s purpose is twofold: firstly, to provide an introductory point for any newer hikers to learn about the pastime, and secondly, to be an aggregate of several of our backpacking and camping articles. We have spent lots of time this year to bring some high-quality backpacking and hiking content. We will discuss both the basics required for lengthier day hikes and backpacking weekends alike.
We have put weeks and weeks of our time preparing these guides so you can bolster your camping and backpacking gear. You can find all our camping articles here.
The magic of day-hiking
A day-hike is any hike that can be completed in a single day. A day-hike can be in a locale a drive away, be an activity for when you are on vacation, or be a part of a longer back-packing trip. For newer hikers that want to break away from local loops and walkways, a day-hike to a nearby location is a great day outing.
To find a day hiking trail, download Alltrails.com or another app or service that has trail information on it. I like Alltrails due to comprehensive information (including distance, elevation, and estimated times of completion) and their clean, easy-to-use interface.
Day-hiking essentials
Day hiking is the best place to start getting out onto nature’s trails if you have not before. Starting small is ideal, so you get a good idea of your ability and fitness level, without really testing these skills in a remote setting.
If you can find a nearby loop or there-and-back trail, that would be your ideal starting location. Here are some things you will need to get used to carrying when you are out on a trail.
- Appropriate footwear
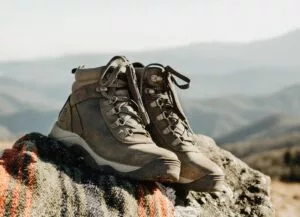
Whether you are walking on a local trail or trying to summit a mountain, your footwear is a key consideration, and the more difficult the trail, the more important your footwear becomes.
A typical pair of running shoes will be more than enough for most trails you can find in your city or town. However, standard runners might not hold up in more difficult locales like mountains, as they do not have the support for long uphill and downhill sections, the traction in muddy or slippery conditions, or the protection from sharp rocks and jagged branches underfoot.
- Hiking poles
Hiking or trekking poles are a great way to add support to your walk, reducing the stress on your knees and ankles by spreading out the point of impact. These poles also allow you to use more of your body, using your arms and shoulders to help maintain stability and give you that extra “oomph” uphill.
- Protection from the elements
Lather on sunscreen, apply bug repellent, dress to the weather. If you are going to be any distance away from a city or your vehicle, consider bringing a first aid kit to prepare for any worst-case scenarios.
- Your phone:
Just in case. Some day-hike locations may be away in the mountains may be out of service range (the tall mountains around you won’t help) and until you have more experience (or a satellite GPS) we recommend staying closer to civilization.
Getting into backpacking
Day hiking is an easy way to get out and enjoy the passages that nature has gifted us, at a level that is suitable to your abilities. You can start as easy as you want, anywhere you want, and turn back at any point you want.
However, some trails out there cannot be completed in a day, and some campsites are many kilometers away from the trailhead. Backpacking expands the scope of your hiking trips, allowing for multi-day trips where you need nothing else but the pack on your back. Backpacking unlocks remote trails, distant campgrounds, and incredible voyages that might otherwise out of reach.
However, backpacking takes skills, gear, and lots of planning. The best way to learn is to join an experienced backpacker, but if you do not know anyone to tag along with, this guide will help you take the first steps in getting ready for your first backpacking trip or maybe getting you ready to plan one of your own.
Early considerations
- A plan
The plan is important, and any backpacking trip needs to be well planned out in advance. You will need to know when you are going, where you are going, and who are you going with. Once these essential facets of the plan are established, you need to think about the smaller details. How many days are you going for? How are you getting to the trail? How much walking are you going to do each day? Will everyone have the gear that they need? Are people tenting with each other? What are you bringing to eat? What is your plan if there’s an emergency? There are so many things a plan should cover, so everyone is on the same page.
- A destination
The destination is the most important decision you need to make in the planning process. You should choose a destination early in the planning process and use that destination to entice friends and family to join you.
When you choose a destination, you will know how hard the trail is (taking distance and elevation into account), the camping conditions (especially important to know if there are outhouses along the way), the hazards associated with the trail (in combination with the time of year) and the sights you will need to see.
We recommend starting on a shorter, easier trail and picking a hike that can be done with one night’s camping. Check into whether you need to book a site, or the area is designated for backcountry crown camping.
- Appropriate gear
Backpacking is all about self-reliance and self-sufficiency. A successful backpack trip will mean you packed all items that you might foreseeably need, but not too many items that carrying your pack is a herculean task. There are some things that are non-optional that you will need, including your bag, an insulator, a shelter of some kind, and food and water. We will cover everything you will need, and some things you might find are nice to bring along later in this article.
- Training
Not a bad idea to train before you walk up a mountain with 20-30 lbs on your back. Depending on your fitness level, this is can be a great deal or not a biggie at all. Just ensure you can keep up with your group, there’s nothing worse than everyone waiting ages for a lagging group member to catch up, and then waiting that same amount of time for that lagging group member to catch their breath.
Backpacking gear
There is a certain level of money that you will need to invest before getting into backpacking. There are ways around dropping too much before getting into backpacking – renting and borrowing gear when possible, can be a good place to start, and using what you have instead of buying backpacking versions of the gear.
We are going to explain in detail what the non-negotiables are when it comes to backpacking, what the big considerations are, and what the bonus luxuries are you might one day want to crack open your piggybank for.
The big three
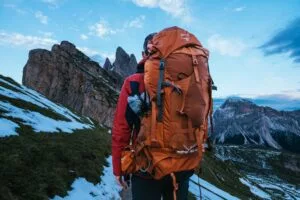
Your backpack is extremely important to your backpacking experience. Since your backpack holds all your gear, your backpack defines what you can bring along with you on the trail. A backpack needs to fit comfortably, especially since a poorly fitted bag with 30 lbs or more inside of it will kill your back. You backpack should fit comfortably on your hips and shoulders
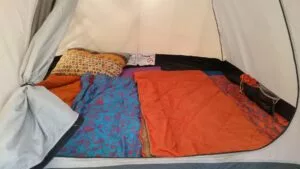
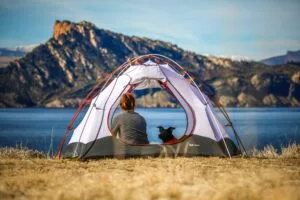
Your shelter is incredibly important when camping, but especially when backpacking. Since you will be far away from the trail head by the time you need to set up camp, you need to trust your tent – no retreating to your car if your tent starts leaking. Your shelter is where you will sleep, store your gear, and recharge – and so you want to feel safe and comfortable inside.
Additionally, the weight of shelters is incredibly important to consider. I’ve seen tents that weigh more than my base weight does. Obviously, these tents are not ideal for bringing out into the backcountry. It might be worth considering looking into buying, or renting, a more lightweight tent –
Hammocks are also a lighter option that pack up small and can prove extremely comfortable to some.
However, some sites ban hammocks, and others do not have the trees to support one or more hammocks on site. If you know these will not be issues for your camping experience.
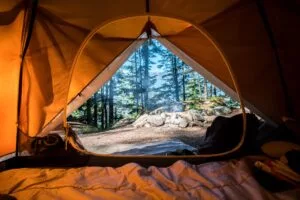
What’s the good of a quality shelter if you can’t get a quality sleep? A sleeping bag and sleeping pad are both essential for getting a good sleep on otherwise would just be ground.
When looking for a sleeping bag, keep in mind the temperatures you will expect to see on the mountain. Even if it is summertime, temperatures can dip into the negatives in the backcountry, especially in mountain ranges. It’s easier to cool off if your bag is too warm than to warm up if you bag is too cold.
Sleeping pads also are rated to different temperatures, so getting an appropriately rated pad along with your sleeping bag will help you stay warm.
The above articles go more in depth regarding what you should look for in a sleep set-up.
The ultralight principle
Backpackers love talking specs, and the one spec that backpackers obsess over is the weight. If you think about it, it makes sense: If you are carrying all your gear with you, you do not want that gear to be back-crushingly heavy. There’s a saying “ounces make pounds and pounds make pain”. Shaving off the ounces for specific pieces of gear can make for a more comfortable experience throughout your time on the trail.
It is suggested that a bag should be no more than 20 percent of your body weight. Ultralight hiking seeks to blow past this weight guidelines, trying to bring as little weight as possible. Ultralight backpacking typically appeals to aficionados with the technical know-how to make the most out of their gear, the money for top-of-the-line equipment, and the slight craziness to cut the tags out of your clothing or shave your toothbrush down.
While ultralight hikers aim to sacrifice their comfort for more performance, you can take the principles of ultralight to improve the comfort of your bag.
The other essentials for backpacking
If you just have your big 3 taken care of, you are still not quite ready to go backpacking just yet. The following is other essentials I believe you need to consider before heading out on the trails.
A first-aid kit with some essentials is incredibly important when you are miles away from your car and possible tens or hundreds of miles away from a hospital.
Think about what you are concerned about injuring on the trail and if there’s any injuries unique to your location, i.e. if you get blisters, or are hiking in tick territory, respectively. There are plenty of common hiking injuries you care foresee and should prepare for, with broken bones, dislocated joints and sprains being some that can be difficult to deal with when you are expected to get yourself back to civilization. Things you should have in a first-aid kit for camping and hiking include dressing or gauze, antiseptic or alcohol wipes, antibiotic ointment, common medications like ibuprofen and antihistamine, and more.
Hiking is an exhaustive activity, and you will need to ensure you are well hydrated throughout your outing. One problem: water is extremely heavy in large quantities. Almost all well-travelled hiking trails have water sources within reach, whether in the form of rivers, streams and lakes. However, that water is not safe to drink until pathogens in the water – mostly in the form of bacteria and protozoa – are removed. There are many ways to remove these pathogens – filtration systems, chemical water treatment tablets, or even just boiling your water.
We highly recommend you bring a filtration system that can filter out all of the pathogens you might find in the water, and a backup method of water purification in case the first one fails.
- Weather protection
What does the forecast look like? Despite the forecast saying it’s going to be sunny your whole hiking weekend, weather in the mountains can be unpredictable, and so you should still prepare for rain, wind, and cold.
We recommend at least bringing some layers that can help protect against the weather. A rain jacket is always a good idea to bring, as is sweaters or hoodies.
- Food
After several hours on the trails, you will by hungry. Like monstrously hungry. Food packing and preparation are two topics
Bringing enough food is a balancing act of hunger and strength, and often you might want to bring less to keep you pack weight down. Trust me, you will likely regret this decision.
So, what food is good to bring on trail? This is something that takes some detail to break down, so we will cover everything about backpacking food and meal in the following section.
What to eat on the trail
Certain foods are better than others when hiking. To help you figure out what is good or not, here are three criteria I use to judge the appropriateness of a foodstuff as either a component of a meal, or as a foodstuff.
- How much preparation does it need?
You work up an appetite hiking in the backcountry, and the last thing you might want to do after hiking for a full day and then setting up your tent is cooking a meal. Think about the amount of time, energy, and equipment that will need to go into a meal. Easy meals include dehydrated backpacking meals, soaking foods, and meals that can be put together without cooking. Snacks should be individually packaged or resealable and not require any prep.
- Is it energy dense?
Food is energy. Bring foods that are calorically dense and have protein. Energy dense foods will pack more calories for less weight. Trail-mix, beef jerky and energy bars are popular with hikers for a reason. Don’t be afraid to stop in the candy aisle either, since chocolate bars and candy can be a great way to pack some extra energy in during the hike.
- Does is have a lot of water weight?
Water weight has a significant impact on the overall weight on most foods. This is why most trail meals come dehydrated – it’s way more weight effective to add water back to the food than to pack out non-dehydrated foods. For example, I prefer taking in dehydrated fruits in over regular fruit, because it is lighter, more compact, impossible to bruise or degrade, and has easier garbage to deal with (plastic bag versus fruit rinds and peels). Meals that need water to be added to like ramen and spaghetti are great options for meals on the trail.
The methods of eating good on the trail
Not only will you need to consider what you are eating when backpacking, but how you will prepare it. Here are some of the best ways for you to eat tasty, healthy food on the trail without bringing too much gear or water weight with you.
Most of the following methods require some kind of heating, which you can find in our camping stove article here.
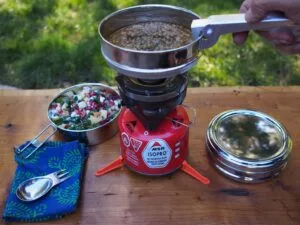
Freeze-dried meals in resealable bags are the easy way to enjoy a favourite like chili or pad Thai in the backcountry. All you need is boiling water and some time for the meal to rehydrate. The simplicity that freeze-dried backpacking meals offer do have downsides – they come in packaging you will need to pack out, range from “mediocre” to “good enough” taste wise, and are expensive.
Dehydrate your own food
If you have a food dehydrator, you can turn your own meals into dehydrated meals for camping. Dehydrating my own meals has resulted in meals much better in terms of flavour than freeze-dried, however the process takes considerable time, since the dehydration and rehydration process are both more labor intensive.
The difference in price is hard to determine – I reckon some of the meals I made were cheaper per portion, but I was gifted my food dehydrator, so I did not have to shell out money to start making my own meals.
Homemade dehydrated things I have made include:
- Chili (beans can be tricky to dehydrate once hydrated, but otherwise chili is a dehydrated staple)
- Curry
- Spaghetti Bolognese
- Beef Jerky
- Soaking
Certain backpackers will swear by cold soaking – the process of soaking dry food with water over a period of time to end up with a meal. It is an easy, lightweight way of enjoying certain foods.
The basics of this task involve bringing a sealable jar that will not leak on you (like a peanut butter jar), and combining filtered water with the dry goods and letting it sit. When the soaked food is ready, it should absorb enough water to soften the dry goods and combine the flavours. This method is really smart for a few reasons – you don’t need to bring a stove or fuel, its easy to do with minimal clean-up, it’s cost efficient, and a strong choice for Fire ban areas or animal heavy areas.
The downsides are you will not get the comfort of enjoying a hot meal, and you will be limited to foods that work well cold soaking.
Some meals that work well with cold soaking include:
- Oatmeal
- Quinoa -based breakfast or dessert.
- Couscous Salad
- Cold soup
- Ramen
- Be creative
Of course, there is hundreds of possibilities that meet these criteria of food you can bring on the trail.
Hundreds of backpacking chefs have created meals that are easy to bring with you on the trail, and you can recreate some of your favourites on the trail too! Consider the factors that make a food good to take with you and you should be able to come up with a number of meals that can be enjoyed anywhere.
You can make your favourites: My most memorable meal was ramen that I boosted with some miso paste and beef jerky. Or you can consume the unholy abomination that is the Ramen Bomb if you need to replenish a LOT of calories.
Safety items for the backcountry
You must consider safety when camping but backpacking with it is especially important. The further into the backcountry you are, the more risks and threats there are that you need to be aware of.
Before any trip, there are a few safety criteria you will need to consider, including the following.
- What time of year are you going? Are there hazards particular to that time of year?
- What wildlife frequent the area? Has there been sightings of dangerous wildlife nearby?
- What type of infrastructure, if any, is at the campground? Any bear lockers? Outhouses?
- How marked are the trails? Are you confident in your navigational abilities?
Here are some safety items we highly recommend you consider:
- Bear spray
Bringing bear spray, in addition to considering how you to protect your food and any other products with a strong odor from animals, is the bare minimum safety precautions you need to take to be bear safe when you are backpacking in Canada
Bear Spray is a super effective last-ditch deterrent that can save lives. However, knowing and using the principles of bear safety is the biggest deterrent of bears and bear attacks.
Ensure your bear spray is within reach at all times – I hang my bear spray from my backpack straps in order to always have it instantly accessible if I do ever see a bear.
- Materials for a Bear Hang
While some of the more trekked trails in bear country will have bear lockers at campsites to store food, toiletries, and other products with an alluring scent – some don’t. The biggest way to attract a bear or another big animal to your campground is with your food, and using bear lockers when available, or food hangs when not, are a solution to this problem.
A bear hang involves hanging any food or smelly products in a tree, away from your campground. It can be a difficult skill to develop, and we recommend practicing if you will have to use a bear hang on an upcoming trip. All you need for an effective bear hang is a length of rope (over 20 ft long), a dry bag of some kind to hold food inside, and at least one carabiner if your knot game is lacking.
Bear hangs are not optimal most of the time, and there are better methods at protecting your food, the camp, and the wildlife in the area. Do whatever the rangers suggest and check up on the trail’s status multiple times in the weeks leading up to the trip.
A bear canister is a container that is designed to withstand a hungry bear for getting into your food. Certain backcountry locales have a higher risk of bear encounters than others, and so different backcountry locales have different rules and policies regarding bears. Some will require you to bring a bear canisters instead for storing your food.
I don’t know if I would describe a pocketknife as a safety item primarily (although they definitely can be used as such) but its presence can be a helpful tool in the backcountry.
Whether you need to open packaging, cutting deadwood for kindling, or building a shelter in a worst case scenario, there are hundreds ways of using a knife.
- GPS system
If you do any hikes individually or in smaller groups, a GPS system is a great tool that offers peace of mind to you and your loved ones. A handheld GPS system that considered backpacking in it’s use of purposes is a great tool: it can help you navigate a difficult trail, keep track of distance travelled, and even send and receive messages when you are out of phone service (with a powerful satellite connection) can be helpful in any kind of situation. These GPS units are expensive and require a subscription, but can be worth it when you are far out in the backcountry.
Get the most out of your clothing
The first time I went backpacking, I wore T-shirts, athletic shoes, and joggers – and I survived. Of course, this was in August weather, and I still got cold in the Rockies that night. But you do not need to optimize your wardrobe – but it can help in rougher conditions.
The following articles can help you choose the best layers for your next hike.
It gets windy in the mountains and by lakes, which have made up the bulk of my backpacking experience so far. Having a layer dedicated to break the wind allows for incredible versatility with how you layer, meaning you can wear the windbreaker on top of warmer insulated layers or by itself.
If I am facing cold weather, I do not leave home without my thermal layers. A thermal layer that you can put under your clothes on the cold days or sleep in is something to seriously consider, especially if you are going early or late in the season.
Socks are socks, right? Why do you need socks for hiking?
Well, when you are walking many kilometers over many days, there’s a lot of things that regular athletic socks will not protect you from.
The typical sock does not have any moisture wicking properties, meaning your sweaty foot leads to a sweaty sock.
Hiking socks often are made from Merino Wool, giving them advantage in terms of warmth, moisture wicking, and cushioning. You got to try it out yourself.
Essential principles
- Go in groups
Backpacking can be dangerous, and solo backpacking even more so. The advantages of having multiple hikers in a group is immense: you can help each other out on difficult sections of trail, share gear so your packs are lighter, and get help if another hiker is injured or needs assistance. Additionally, animals will try harder to avoid bigger groups.
- Let people know where you are going
Going off of the last point, you should let people you are close with who are not backpacking your plans. You should tell people where you are going, the name of the trail you will be on, the duration of your trip, and most importantly when you expect to be back. Informing others about this information is a huge safety precaution, so in the case something bad happens and you are stuck or lost, rescue crews will know when and where to look.
- Stay away from animals
It drives me crazy when I see those videos from tourists getting up close and personal with wildlife like bears, moose, and bison. While these animals at the side of the road are definitely very dangerous, your vehicle is likely not far away. When you are in the backcountry, you are in the animal’s habitat, and do not have a metal box that can protect you.
- Pack everything you bring with you out.
I reserve the title “horrible person” for those who really deserve it: Vladimir Putin, Elon Musk, the Sackler family, etc. I also reserve this title for people who litter their garbage on the trail and campgrounds in the backcountry.
Seriously, you should be prepared to pack out EVERYTHING you and your party bring with you. Garbage, excess food, and even unfortunate things like you or your dog’s feces need to be dealt with in a responsible manner.
There’s NOTHING worse than setting up camp and walking around to see mounds of decomposing toilet paper across the forest floor. Don’t like this? Stick to day-hikes then.
Frequently asked backpacking questions
Where to rent backpacking gear?
Certain locales across Canada will have businesses that intend to rent camping and hiking gear, but as someone who has never had to rent gear, I have no experience with such businesses. However, rentals can make experiences
Our advice: Find a local shop that offers rentals, if any. If you have the option to try on the gear, opt to do so – you do not want to have to settle with an ill-fitting backpack for an entire trip.
How to organize backpacking gear?
Organizing backpacking gear in your bag has a learning curve. How you pack your bag will have a significant impact on the comfort of your bag, the accessibility of needed items, and the weight distribution of the bag.
- Foresee what you will need during hiking sections, and pack those items last on the top of your bag. Snacks, sunscreen, bugspray, rain gear and water filtration are all strong candidates for the top of your bag. These items can also go into any outside pockets, but it is still idea to reserve the top of the bag for any items you might need before you stop to set up camp.
- Load up the zones appropriately. REI has a good article on this. What it says is that you should consider the main pocket of a backpack in three zones: the bottom is best for bulky gear you do not need until you are setting up your campsite, the Core Zone is where food and heavy items should go so your bag feels more balanced, and as we just talked about, the top zone is best for other bulky items you might need mid trip.
- Use your straps and pockets. These can spread out your gear and balance the weight. Sometimes, you are not limited by the weight you can carry, but how much fits in your bag. Strapping a bulky component like a sleeping bag or tent is sometimes the answer to this. However, keep in mind using straps and outside pockets exposes items to water and the weather outside.
- Don’t be afraid to leave stuff behind. Obviously, everything we have covered previously is important to bring, and cannot be forgotten about. But there is likely a lot of superfluous gear in your camping shelf or closet you do not need to bring. Think about if you really need something, or if you can get by without or by substituting a piece of gear. I have learned this the hard way, bringing way too much kitchen gear with me that I did not need. I do not regret bringing my Helionox though. Never.
How to fly with backpacking gear?
From Argentina to Alaska, Vietnam to France, there are famous backpacking locales all over the world. Travelling to these destinations will be worth it for many, but also provide a large amount of things you will need to consider backpacking in another country. If you are going to fly there, flying with your gear can be daunting.
Often, lots of items you might need in your bag cannot be taken as a carry-on item. Instead, consider checking your bag. Some items, like fuel for your gas stove, cannot be transported when checked, but most items can go through baggage check. Go through your gear and look for anything you can’t take on your flight. Then pack your bag, and when packed, wrap it up in a clear garbage bag and tie it up so everything is tightly packed inside (as shown in this article).
When is the best time to buy backpacking gear?
This is a hard question, because it varies on a lot of different factors. If you are looking for cheap gear on clearance, that usually comes at the end of the season when the leaves start to change colour.
However, most of the best equipment is made by smaller “cottage companies,” and hyped gear can go fast. These products are announced during spring and early summertime usually, and can be sold out quickly.
How to store backpacking gear?
It depends. The biggest killer of camping gear (other than wear and tear in the field) is the presence of moisture while stored. This can lead to the breakdown of materials and the buildup of mold or mildew.
So the number one best practice when it comes to storing your backpacking gear is making sure it is dry. I unpack my tent and sleeping bag and let it dry out in the air or sun before packing up the tent and storing (I don’t pack my sleeping bag up to store it).
Certain pieces of gear need different storage choices. Sleeping bags and mats are often left unpacked and hung up, so that the insulation and baffles do not wear down or compress while stored. Other items should probably be stored with their storage container.
Read more
The Best Pocket Knives in Canada
A quality pocketknife can be one of the handiest tools in many situations.
The Best Coolers In Canada
Looking to keep your drinks cold all summer? This cool guide will help you pick the best cooler.
The Best Sleeping Pads in Canada
Sleep is important, especially when camping. Stay well rested with the best sleeping pads in Canada.
How to Make Your Tent Last Longer
Your tent is an investment. Maximize your tent’s lifespan with this guide.
I’ve been exploring terpene-based products [url=https://terpenewarehouse.com/collections/cannabis-terpenes-diamond ]cannabis terpenes for sale[/url] recently, and I’m really enjoying the experience. The scents are well off, typical, and pleasant. They enlarge a outgoing caress to my day after day drill, ration fasten on the mood and atmosphere. A large catch sight of to save anyone who appreciates pungent wellness tools.
I’ve been exploring terpene-based products https://terpenewarehouse.com/pages/are-botanical-terpenes-safe recently, and I’m deep down enjoying the experience. The scents are in the chips, customary, and pleasant. They add a nice caress to my day after day habit, dollop beat up a compare the atmosphere and atmosphere. A massive catch sight of for anyone who appreciates aromatic wellness tools.
I’ve been exploring terpene-based products terpene enhancer recently, and I’m deep down enjoying the experience. The scents are well off, typical, and pleasant. They add a gracious caress to my always habit, helping beat up a compare the mood and atmosphere. A massive track down quest of anyone who appreciates pungent wellness tools.
I’ve been using https://www.nothingbuthemp.net/collections/thc-beverages constantly seeing that on the other side of a month at the moment, and I’m indeed impressed during the positive effects. They’ve helped me perceive calmer, more balanced, and less solicitous everywhere the day. My sleep is deeper, I wake up refreshed, and straight my focus has improved. The value is outstanding, and I cherish the sensible ingredients. I’ll definitely preserve buying and recommending them to everybody I recall!
I started irresistible https://www.cornbreadhemp.com/collections/thc-drinks a itty-bitty while ago well-grounded to last what the hype was thither, and fashionable I truly look forward to them preceding the time when bed. They don’t left me abroad or anything, but they gain it so much easier to chill and disappointing collapse asleep naturally. I’ve been waking up view nature more rested and not sluggish at all. Even-handedly, description of wish I’d tried them sooner.