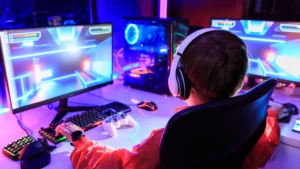
How to Build a Gaming PC: An In-Depth Guide
Building your own gaming PC has several benefits. With the right components, your gaming rig can last for several years. You’ll be able to play any video game at the highest settings and work on multiple projects at the same time. Plus, building a gaming PC can be a rewarding and fun experience. But building a gaming computer seems like a daunting task. With so many steps, knowing where to start is difficult. Before writing this article, I had next to no idea on how to build a gaming PC. I’ve considered the idea several times, but I never attempted the task. I ended up buying a pre-built gaming PC to avoid the hassle. But after doing some research, I have a much better idea on how to build one. This article will go over how you can build your own gaming computer, step-by-step.
Note: This guide is not a set rule book on building a gaming PC. The following information are merely recommendations/suggestions. This guide is best used as a reference when constructing your gaming computer.
What to consider when building a gaming PC
There are a few things you should consider before you begin building. The first thing you should ask yourself is: what do you want to use your gaming PC for? In other words, what games do you want to play, and what other applications do you want to run? The answer to this question will determine how powerful your gaming PC will be.
Another important consideration is your budget. Think about how much money you are willing to spend on your build. Budget gaming PC builds can cost as low as $500. However, these computers do not have the same performance as high-end models. The average cost for a DIY gaming PC is $1,000-$2,000. Higher end builds sometimes cost more than $3,000.
Lastly, be mindful of any parts shortages. When these occur, certain components become hard to find. If the component is in stock, the price is astronomically high. The most recent shortage occurred in 2020-2022, also known as the graphics card shortage. Due to disrupted supply chains, the stock of GPU chips dried up. Those available commanded expensive prices (in some cases up to $3,000). By March 2022, the situation started to improve. Now, your can easily buy graphics cards, although prices are still high: around $1,000-$2,000 for high end models, $300-$500 on average.
Gaming PC components
There are seven essential components for a gaming PC:
- Processor (CPU): The processor is the engine that runs the computer. It interprets and carries out various commands. High-end CPU’s can quickly process and transmit information. This means tasks are completed faster.
- Graphics card (GPU): The graphics card is responsible for rendering images from your PC and displaying them on your monitor. The GPU affects the graphics of your game plus the resolution for other apps.
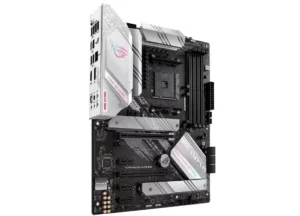
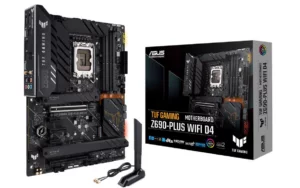
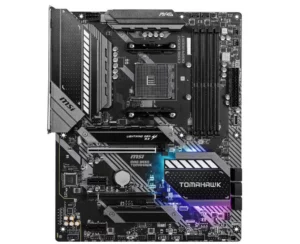
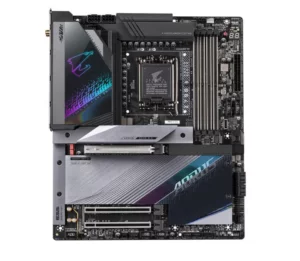
- Motherboard: The motherboard is home to most of your computer’s components. An important thing to be mindful of is the compatibility of the motherboard with the parts you select. But there are some boards that have integrated graphics, Wi-Fi, sound cards, and other parts. Motherboards come in several sizes. The most common are ATX and mini-ATX.
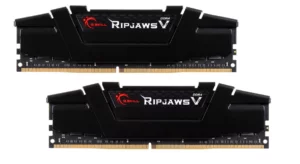
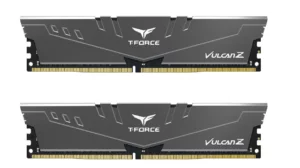
- Memory (RAM): Random Access Memory, or RAM, affects how much information your computer can process. Your computer uses RAM to store information until it’s ready to use it. If your computer has lots of RAM, information is processed quicker. This is useful for competitive gaming.
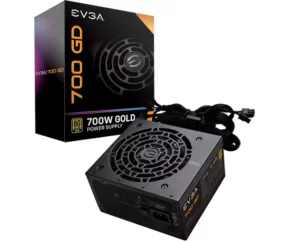
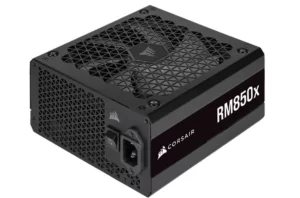
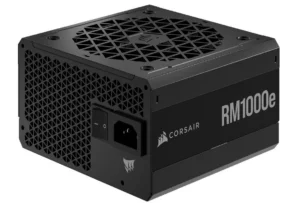
- Power supply (PSU): The power supply transfers electricity from an outlet to power your computer. The PSU is one of the easier components to shop for. You don’t have to worry to0 much about part compatibility. The biggest consideration is the wattage the PSU can handle. Also, make sure the PSU has enough cables and connectors for the other components.
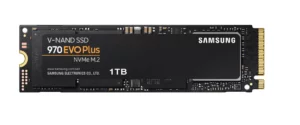
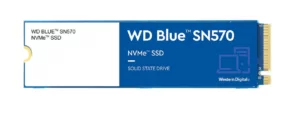
- Storage: Computer storage comes in two forms: hard disk drives (HDDs) and solid-state drives (SSDs). HDDs use spinning disks and platters to process data. SSDs do not use moving components. Instead, they use an integrated circuit to store data. SSDs are faster, more durable, and are best for storing games. HDDs have longer lifespans and are best for storing movies, photos, and PDFs/other word documents.
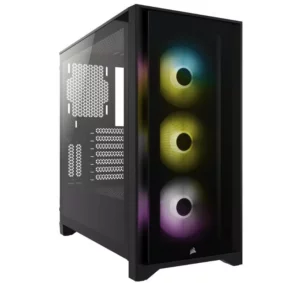
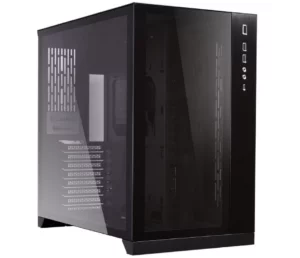
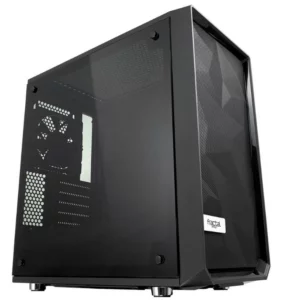
- Case: The last essential part is the computer case. It’s where the other six components are stored. Choosing a case is largely based on aesthetics, but you should pick one that’s large enough to fit all the parts. Larger cases also give you enough room for customizations/upgrades.
Additional components include
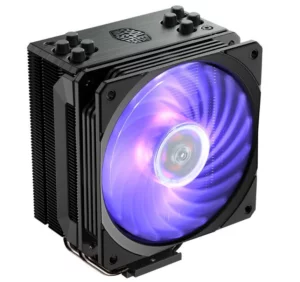
- Cooling fans: These control your computer’s operating temperature. Without cooling fans, your gaming PC can easily overheat, which negatively impacts its performance. Most computer cases have spots for cooling fans. You can also install liquid cooling instead.
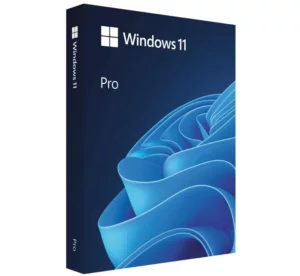
- Operating system (OS): The operating system manages your computer’s hardware and software. Two commons OS’s for gaming PCs are Windows and Linux. Both have to be purchased separately from retailers. There are different ways to install and OS. A common process is downloading the software onto a USB stick. For installing Windows 10 to your gaming PC, check out this article by PCGamer. For installing Linux, check out this guide by Guru99.
You’ll also need at least two small screwdrivers (a Philips head and flathead), torx scredriver bits, anti-static equipment, and a flashlight. In some cases, you’ll need extra thermal paste (for CPUs and CPU coolers), pliers, zip ties (for cable management) and cleaning solution (e.g., rubbing alcohol).
Creating a list of components for your gaming PC will help keep your organized. When I attempted to build my own, I did not use a list I quickly lost track of which parts I needed to buy.
Buying PC components
You can buy computer parts from several retailers. Newegg is one of the best places to shop for parts. The company sells components from various manufacturers, and the selection is usually good. You’ll find the latest offerings from Intel, AMD, CORSAIR, MSI, and others. Newegg also ships throughout Canada. Best Buy is a big box store that sells gaming PC components. You can also find parts on Amazon. Memory Express is a computer store with a wide selection of components. Unfortunately, the stores are not located across Canada, only in certain parts of Alberta, B.C., Manitoba, Ontario, and Saskatchewan. But online shipping is available.
Unfortunately, you can’t just buy the first seven parts you find and call it a day. You have to be mindful of part compatibility. Some parts do not work with each other. For example, a motherboard might use a different socket type than the CPU you bought. Luckily, there are some websites that check the compatibility of the parts you select. PCPartPicker is the best example. The site lets you build your computer piece by piece while making sure the hardware works together. PCPartPicker also provides prices and links to retailers. PCBuilder is a similar website, although the parts listed seem to be more expensive.
Several websites advise buying components from reputable vendors. Online stores like Amazon and Newegg allow third party retailers to sell products. Components shipped and sold by these companies usually cost more than the regular price. Plus, the quality can be inferior.
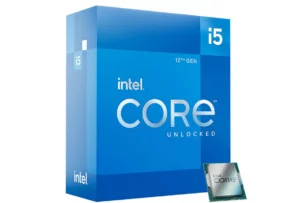
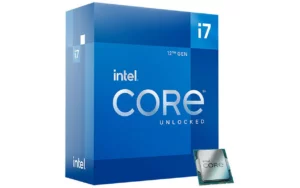
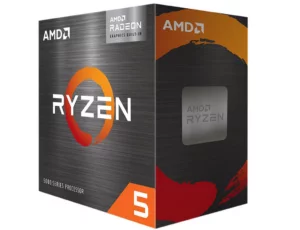
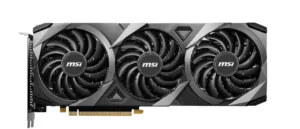
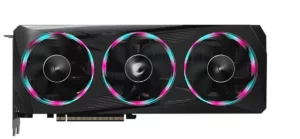
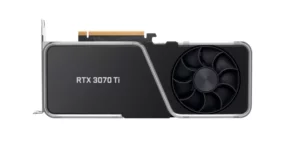
The following are some suggested gaming PC components.
Example PC components
Putting everything together
Now comes the fun part: building your gaming PC. While the process can be confusing, it’s easier than you think. All it takes is some patience and guidance. Remember that the building process varies based on the parts you select. We’ve tried to keep things as broad as possible.
Before you begin, set up your workspace. Place the components on an elevated space, like a desk or table. It’s a good idea to give your area a quick sweep/dusting. PC components need to be clean for as long as possible. Laying them out on a dirty surface is not a good way to start your build. Avoid building on a rug or carpet. Doing so can create static electricity, which will damage your gaming PC. To further prevent static damage, where an anti-static wristband. The most important thing is to keep your work area organized. Screws and other tiny parts easily get lost in a cluttered workspace. Keeping things neat and organized will make the process much easier.
Once your workspace is ready, unpack your motherboard. As mentioned earlier, the motherboard houses most of your computer’s components. Since the board will be full of parts, it makes sense to start there.
Step 1: Install the CPU
The first piece you should add to the motherboard is the CPU. According to Newegg, installing the CPU is one of if not the most important parts of the building process. The CPU is also fragile, so some caution is needed. Do not touch the golden contacts on the underside of the processor. You should hold it by its edges with your thumb and pointer finger. To install the CPU, lift the latch, place the CPU in the socket, and lower the latch. CPUs are designed to fit only one way. There is a problem if the chip doesn’t fit. The cause is usually different socket types.
Step 2: Install the CPU cooler
As I mentioned above, there are two types of computer cooling, air based and liquid based. To keep things simple, we’ll stick to air cooling. Installing your cooling unit will slightly differ based on brand and model type. In general, most coolers will require you to attach a plate on the back of the motherboard. The cooler will be installed from the front. But before you start installing the cooler, make sure you have enough room for your RAM. If your cooler blocks the RAM slots, you’ll need a smaller unit.
To start, apply a small glob of thermal paste to the centre of the CPU chip. This substance lets heat transfer between the two parts. Line up the cooler and attach it to the processor chip. Try to evenly spread the paste across the two surfaces. If you see the paste spilling over, it means you added too much. Simply wipe up the excess paste with cleaning solution and a cloth. Next, plug the cable fan into your motherboard’s fan header.
If you run into any problems, consult the cooler’s instruction manual. The entire process is illustrated with labels and diagrams, which are useful visual aids. Following the instructions will help make this step easier.
Step 3: Install the RAM
Installing RAM is one of the easiest parts of building a gaming PC. Find the RAM slots on your motherboard, line up the RAM module with the slot, and attach the two together. You’ll hear a small click when the RAM is fully inserted. Repeat the process for any additional RAM you have.
Step 4: Insert storage
Installing storage is another simple procedure. The process depends on the type of storage you have. For small M.2 SSDs, insert them into the storage slot on your motherboard. The drive initially rests at an awkward angle, but there’s nothing to worry about. Slowly lower the SSD into the proper configuration. Some drives require you to screw it in place. HDDs also go on your motherboard, but they are harder to install due to their large size. You’ll have to do some maneuvering in order to fit the drive in its slot.
Many cases have hard drive bays for 2.5 inch or 3.5 inch SATA SSDs or HDDs. If you have additional hard drives, this is the place to put them. Installation is quick and easy. Fit the drive into the drive bay and place it in the mound. The drives need a SATA cable to transfer information, so make sure you have them in your inventory.
Step 5: Insert the input/output shield
Before attaching your motherboard to the case, attach the input/output shield (I/O shield). This piece protects the computer from static and keeps out dust and dirt. Line up the shield ports with your motherboard to get the configuration right. Next, slide the shield into its slot on the case.
Since the motherboard essentially blocks the slot, installing the I/O shield first makes things easier. Otherwise, you have to remove the board to give yourself enough room.
Step 6: Install the motherboard
Now its time to hook up your motherboard to the computer case. Start by removing the side panel and laying the case on its side, ideally on a soft surface to prevent scratching. The motherboard slot is fairly easy to find. Look for series of holes which match the screw holes on your board. If the holes are empty, you’ll need a part called a standoff. The piece prevents the motherboard from contacting the metal case frame. This prevents electrical shorts from occurring. Once the standoffs are inserted, line up the motherboard with the I/O shield. Use the included screws to connect the board to the standoffs. While the motherboard should be firmly secured, attaching it too tightly can cause bending and other damage.
Optional step: Install cooling fans:
If you have additional cooling fans, attach them to the case and connect them to the motherboard. Cooling fans usually go in the front, back, and top of the computer case. The important thing is to ensure they provide good airflow. Ideally, the fans should be blasting air on the heat-generating components.
Step 7: Install the GPU
To start, remove some of the dust barriers from the case. You may have to remove a few or all of them depending on the GPU’s size. Removing the barriers gives you ample room to install your GPU.
Locate the PCIe slot on your motherboard. Gently insert GPU into the slot. Press down until you here the latch click. If possible, screw the GPU to one of the dust barrier slots. This helps keep the GPU firmly in place.
Step 8: Install the power supply unit
The last major part of the build is installing the power supply unit. The PSU usually sits at the bottom of the case. Slide the PSU into the square area, making sure the fan is facing the rear vent. Use your screwdriver to lock the unit in place. Once the PSU is installed, start connecting the unit to the other components. The PSU comes with the corresponding power cables, either attached (traditional) or detachable (modular). Either way, simply connect the cable from your PSU to the component. You might have to work in some tight spaces, but patience is key. The goal is to connect everything while keeping the cables relatively organized.
Step 9: Connect the power and test the PC
Now that everything is installed, it’s time to connect your gaming PC to some power. The case will come with cables that power the switches and LED indicators on your case. Connect them to the corresponding ports on your motherboard. All that’s left is to plug the power cable to the PSU, connect your monitor, keyboard, and mouse, hit the PSU power switch, and press the power button. If everything works, you’ll hear the fans spinning and see your motherboard’s logo displayed on your monitor. But if your PC doesn’t boot up, don’t panic. You’ll have to do some troubleshooting, but most times the problem is minor. I’ll address troubleshooting shortly.
A note on cable management
As you may have guessed, a gaming PC uses lots of cables. These cables can easily become a tangled mess. Poor cable management poses two problems. First, it can impact you PC’s performance. Unorganized cables obstruct airflow, leading to higher temperatures. As noted earlier, higher temperatures equal a poorer performance. Secondly, messy cables do not look good. Most gamers want their gaming rig to look impressive, and unorganized cables are not aesthetically pleasing.
At first glance, cable management seems difficult. But the process is fairly simple. Most cases are designed for cable management. For example, a case will come with Velcro straps, zip ties, and other tools for organizing cables.
This article by TechGuided has some good examples of cable management.
Frequently asked questions about building a gaming PC
Who needs a gaming PC?
Casual and hardcore/competitive gamers are the main users of gaming PCs. However, gaming PCs can perform other tasks. Thanks to their powerful components, people use gaming PCs for:
- Photo editing/graphic design
- Video editing
- Music production
- 3D modelling
- Computer programming
- Working on documents (Word, Excel, PDF readers etc.)
- Buying and selling cryptocurrency + crypto mining
Which is better, a DIY or prebuilt gaming PC?
There isn’t a clear-cut answer to this question. It really depends on your preferences. Still, there are pros and cons for each type.
Prebuilt gaming PCs are complete systems made by manufacturers; all the components are installed for you. They are popular for their convenience and ease of use. For new PC gamers, prebuilt models are a great option. The downside is you have no control over the parts the manufacturer uses. Most prebuilt gaming PCs have good hardware, but some users prefer to customize the machine to their liking.
DIY gaming PCs are easier to customize and upgrade. You can built the computer according to how you want to use it. If you’re into competitive gaming, you can install a high end GPU. Or if video editing is your thing, you can add more RAM and a powerful CPU. Basically, you can make your gaming PC as powerful as you want. Building your own gaming computer does require some technical know-how, but as shown in this guide, the process isn’t as hard as it seems.
If you’re not interested in DIY or prebuilt rigs, custom gaming PCs are a good alternative. These computers are built by a manufacturer, but you have the freedom to choose the components. The NZXT Custom PC builder is one example.
What do I do when my gaming PC doesn’t work?
If your gaming PC doesn’t boot up, you’ll have to do some trouble shooting. In most cases the issue isn’t major and requires a simple fix. However, there are rare occasions when the problem is much more serious.
If you’re PC doesn’t start, incorrect or loose wiring is the likely culprit. For example, plugging cables into the wrong port is a common mistake. Double check that each cable is securely connected to its proper port. Also check for any loose components (e.g., loose fitting RAM). If your PC turns on but shuts down after one or two hours of heavy use, then overheating is probably the cause. Check your cable management and adjust accordingly. The worst-case scenario would be replacing or adding additional cooling fans; this requires some disassembly.
If you can’t identify the problem, try removing each component until the PC boots up. This helps you identify the faulty part. If a part is broken, contact the manufacturer to get a replacement. Most companies will give you a new part free of charge. The last option left is to take your gaming computer to a PC repair shop. This will cost you a couple hundred dollars. Hopefully you do not find yourself in this situation. You can also take your computer to a tech savvy friend; they’ll repair your PC either for free or at a lower rate.
Sources used
Tom’s Guide: How to build a gaming PC for beginners: All the parts you need
Wired: Want a Better PC? Try Building Your Own
Tom’s Guide: How to build a gaming PC for beginners: Putting it all together
Newegg: How To Build a PC – Newegg’s Step-By-Step Building Guide
Read more

The Best Gaming Keyboards in Canada
Whether taking aim in a FPS, to racing against others online, a dedicated gaming keyboard will amp up your PC gaming performance.

Best Gaming Headsets in Canada
We’ve reviewed multiple gaming headsets available in Canada for a wide range of needs.

Switch It Up With The Best Nintendo Switch Accessories
Enhance your gaming experience with these selections of accessories.
The Best Gaming Chairs in Canada
Gaming chairs are an important, if not essential, part of the gaming experience.



Nice article inspiring thanks. Hello Administ .